
A Comprehensive Guide to Ultrasonic PCB Cleaning: Solutions, Sensitivity, and Best Practices
When it comes to cleaning printed circuit boards (PCBs), ultrasonic cleaning is a powerful way to remove tough residues, contaminants, and flux. However, there are still myths about it, especially regarding the risk of damaging sensitive electronic components. This guide will clear up these misconceptions, explain how ultrasonic cleaning works, and give you some best practices to avoid damaging components.
How Ultrasonic PCB Cleaning Works
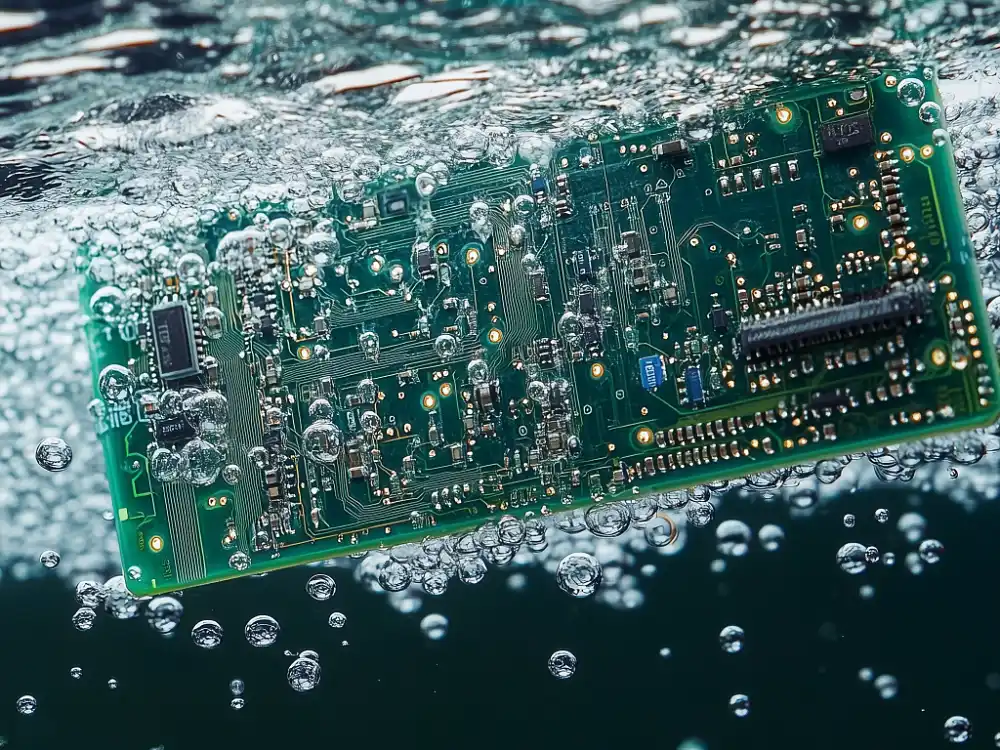
Ultrasonic cleaning uses high-frequency sound waves to create millions of tiny bubbles in a cleaning solution. These bubbles collapse (or ”cavitate”) with force, knocking dirt, flux residues, and contaminants off the surfaces and crevices of the PCB. This process, called transient cavitation, generates small liquid jets that effectively clean even hard-to-reach areas. Ultrasonic cleaning can reach every small space in a complex assembly, making it very effective for cleaning densely populated PCBs. Additionally, ultrasonic cleaning systems are more compact than other cleaning machines, which makes them suitable for a wide range of uses.
The process involves immersing the PCB in a liquid bath—either water-based or solvent-based—where ultrasonic waves create cavitation. The force from cavitation can be very effective, but it must be managed carefully to avoid damaging delicate components.
Debunking the Myth: Does Ultrasonic Cleaning Damage Components?
There is a persistent belief that ultrasonic cleaning can damage electronic components. This concern comes from the 1970s, when early ultrasonic cleaning machines didn’t have features like frequency sweep and relative movement. Because of this, some areas in the cleaning bath had too much energy, known as hotspots, which could damage components like quartz oscillators. These oscillators operate at similar frequencies to ultrasonic waves, making them especially vulnerable to damage. Even today, it’s best to avoid cleaning such oscillators with ultrasound to prevent invisible damage that could affect their frequency.
Modern ultrasonic cleaning systems have solved many of these issues with new technology like frequency sweep and controlled movement of parts, which help to reduce hotspots. In fact, official IPC test methods (e.g., IPC TM-650) have shown that ultrasonic cleaning does not damage electronic assemblies when proper settings are used.
The Role of Hotspots in Ultrasonic Cleaning
Hotspots are areas in the cleaning tank where ultrasonic energy is higher, formed by the reflection of sound waves off surfaces like tank walls. These areas can make cleaning more effective but also pose a risk if the energy is too concentrated in one spot.
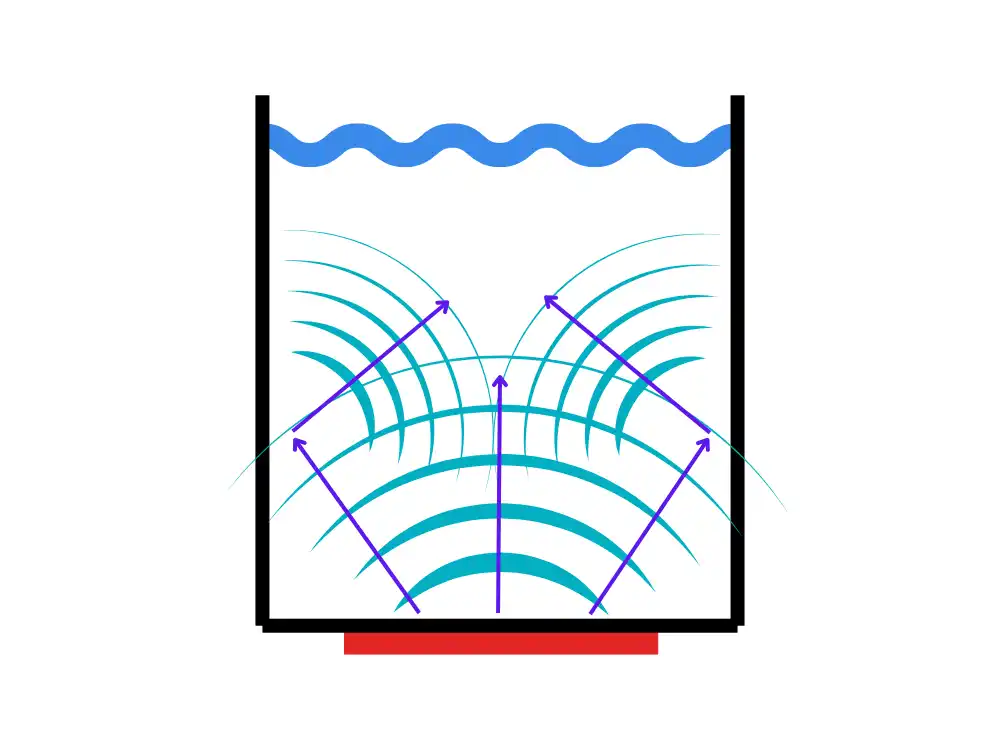
To manage this, modern ultrasonic cleaning systems use techniques like:
- Relative Movement: By moving the parts through the ultrasonic field, the effects of hotspots are spread out, reducing stress on sensitive components.
- Frequency Sweep: This method involves changing the frequency of the ultrasonic waves during the cleaning cycle. This helps move the hotspots around, making the cleaning effect more even.
- Oscillating Basket: Using an ultrasonic cleaner with an oscillating basket helps move the parts around during cleaning, spreading out the effects of cavitation across the entire surface.
Choosing the Right Frequency for Ultrasonic Cleaning
Choosing the correct ultrasonic frequency is key to balancing effective cleaning with protecting delicate components:
- Low Frequency (20-30 kHz): This creates larger cavitation bubbles and stronger cleaning power, but it can be too harsh for fragile components.
- Medium Frequency (35-45 kHz): This provides a good balance of cleaning power and gentleness, making it great for general PCB cleaning.
- High Frequency (60 kHz and Above): This produces smaller bubbles with gentler cleaning action, making it ideal for boards with sensitive components like MEMS sensors.
Water-Based vs. Solvent-Based Cleaning Solutions
The choice between water-based and solvent-based cleaning solutions depends on several factors, including the types of contaminants, component sensitivity, and safety considerations.
Water-Based vs. Solvent-Based Cleaning Solutions
- Water-Based Solutions: Water-based cleaning solutions are environmentally friendly and safe to use. However, their cleaning efficiency may not always match that of solvent-based solutions, so thorough testing is essential to confirm their effectiveness in removing residues.
- Solvent-Based Solutions: These are better for removing tough residues but have safety and environmental concerns.
Best Practices for Avoiding Damage to Sensitive Components
While ultrasonic cleaning is very effective, improper use can lead to damage, especially in sensitive components. Here are some key practices:
- Check Component Compatibility: Not all components can handle ultrasonic cleaning. Always check the manufacturer’s guidelines first.
- Control Cleaning Time: Avoid overexposure to ultrasonic waves, as it can increase stress on components. Tests have shown that reducing power output by up to 50% can still achieve effective cleaning while reducing risks.
- Proper Positioning: Use an ultrasonic cleaner with an oscillating basket if possible to ensure even exposure and reduce the chance of hotspots.
- Use of Frequency Sweep: Always use systems with frequency sweep to reduce the impact of hotspots.
Final Thoughts
Ultrasonic cleaning is a valuable tool in PCB manufacturing and maintenance, offering deep cleaning that other methods can’t match. The use of modern features like frequency sweep, relative movement, and oscillating baskets has made ultrasonic cleaning safer and more efficient, ensuring thorough removal of contaminants while reducing the risk of component damage. By following best practices and using the right equipment, ultrasonic cleaning can be both safe and highly effective for cleaning PCBs.


